No products added!


If your dental crown suddenly becomes loose or falls off, knowing how to temporarily fix a loose crown at home can help you protect the tooth and reduce discomfort until you see a dentist. While this is not a permanent solution, a proper temporary repair can prevent further damage, sensitivity, and infection.
Dental crowns can loosen due to worn cement, tooth decay under the crown, biting on hard foods, or trauma. Acting quickly and correctly is important to avoid complications.
This guide explains how to secure a loose crown safely, what materials to use, and when you should seek urgent dental care.
A loose crown exposes the prepared tooth underneath. That tooth is often smaller, sensitive, and vulnerable to:
Even if there is no pain, leaving the crown off for too long can create bigger dental issues.
You may attempt a temporary fix if:
Do NOT attempt home repair if you experience:
What You Need for a Temporary Crown Repair
For a safe temporary crown repair, you should use proper dental materials. Avoid household glues or adhesives.
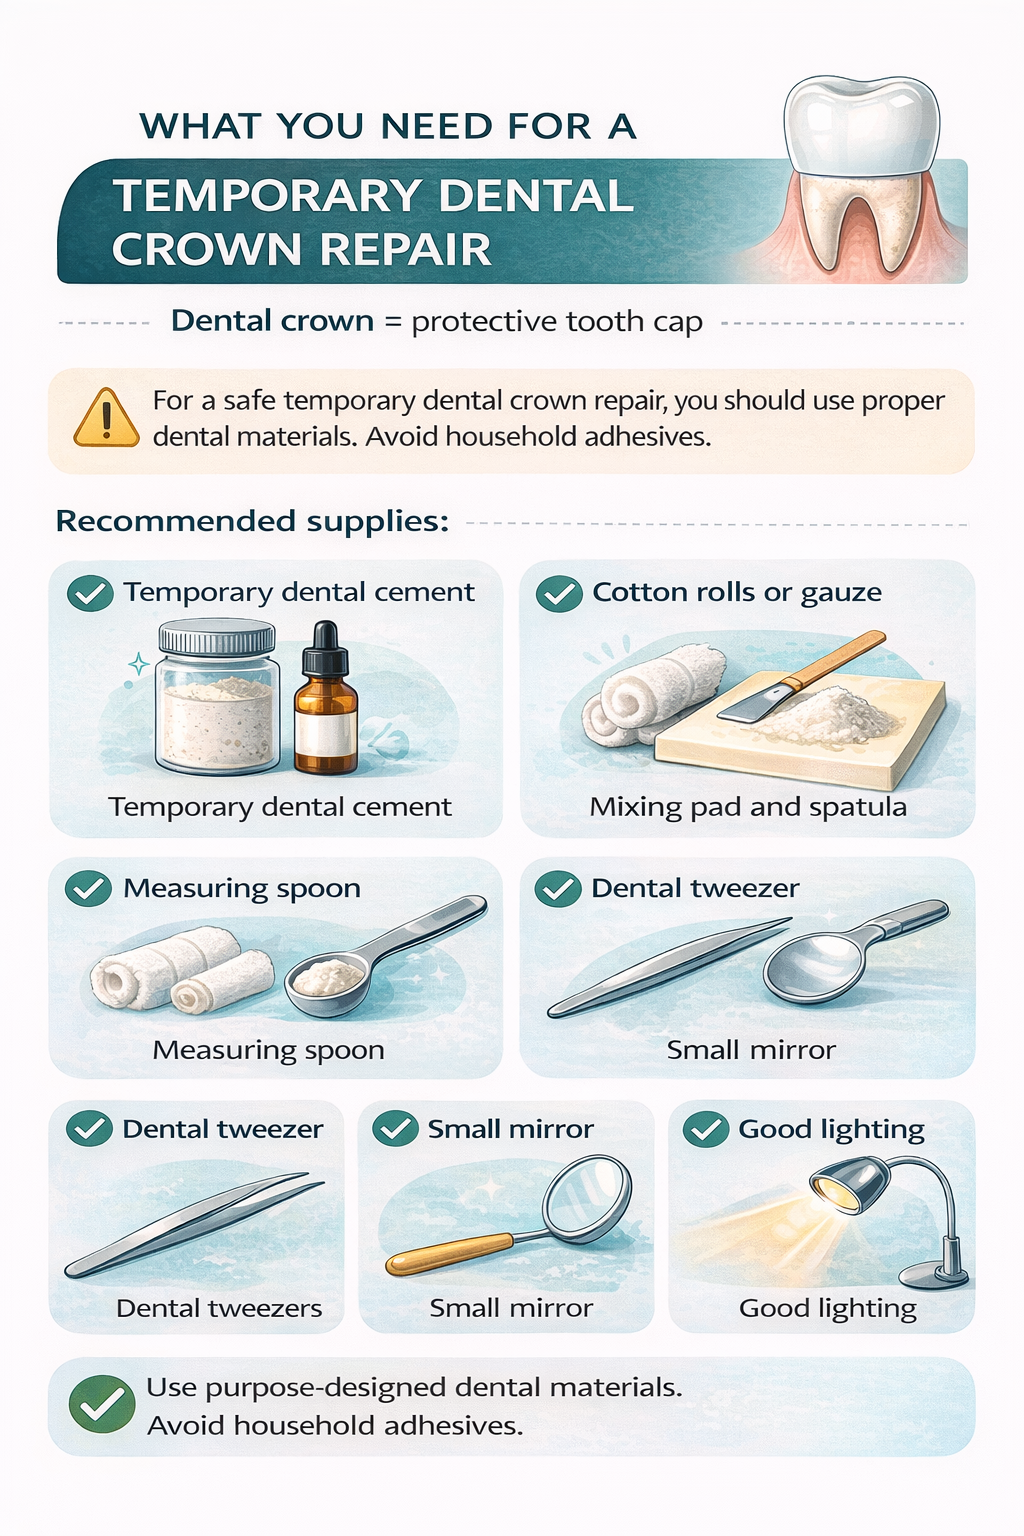
Recommended supplies:
Using purpose-designed dental repair materials improves temporary stability and reduces risk.
When dealing with unexpected crown loss, having a complete dental repair kit at home makes the process easier and safer.
The HM Zinc Oxide Eugenol Dental Care Kit is designed for temporary dental situations and includes:
Instead of improvising with unsafe materials, using a dedicated temporary dental repair kit provides better short-term support until your dentist permanently re-cements the crown.
Follow these steps carefully.
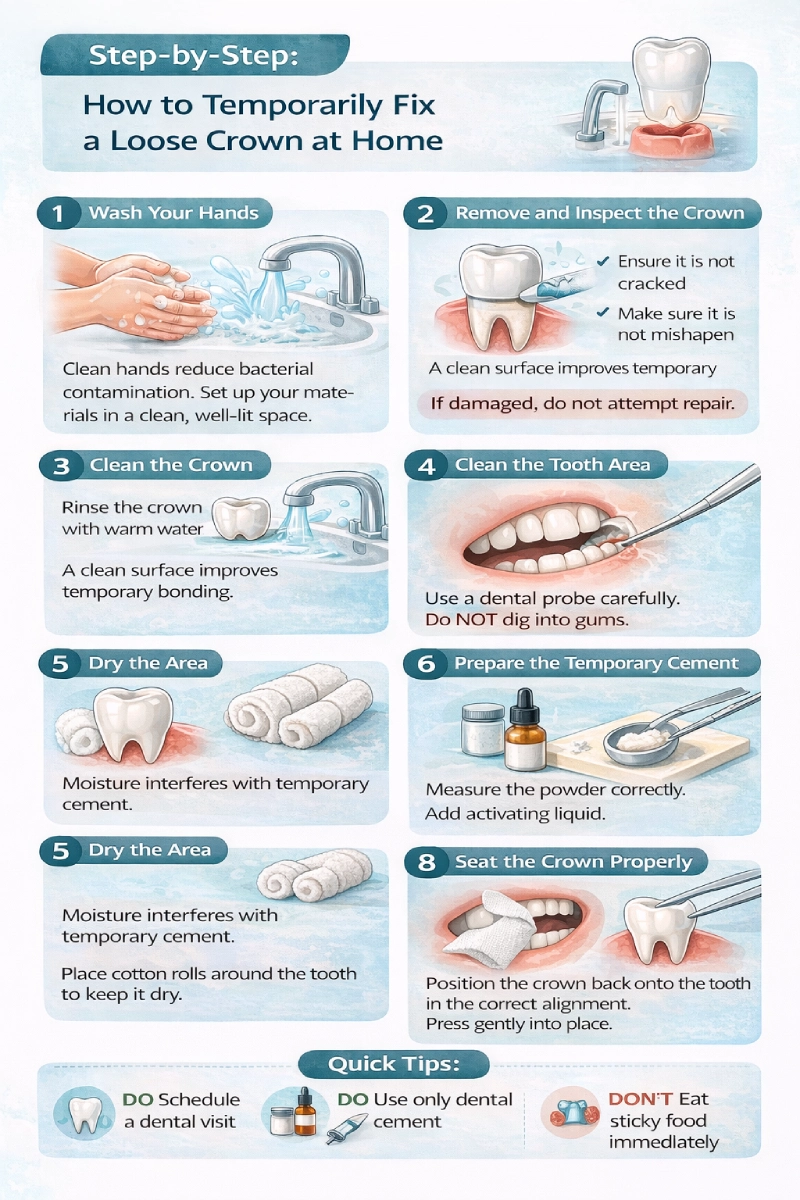
Step 1: Wash Your Hands
Clean hands reduce bacterial contamination. Set up your materials in a clean, well-lit space.
Step 2: Remove and Inspect the Crown
If the crown is loose but still attached, gently remove it.
Inspect it carefully:
If damaged, do not attempt repair.
Step 3: Clean the Crown
Rinse the crown with warm water.
Gently remove any old cement residue without scraping aggressively.
A clean surface improves temporary bonding.
Step 4: Clean the Tooth Area
Rinse your mouth gently.
Use a dental probe carefully to remove visible debris around the tooth.
Do NOT dig into gums or cause bleeding.
Step 5: Dry the Area
Moisture interferes with temporary cement.
Place cotton rolls around the tooth to keep it dry.
Step 6: Prepare the Temporary Cement
Measure the powder correctly.
Add the activating liquid as directed.
Mix until you achieve a smooth, workable paste.
It should not be overly runny or too thick.
Step 7: Apply Cement to the Crown
Place a thin layer inside the crown only.
Avoid overfilling — excess material can irritate gums.
Step 8: Seat the Crown Properly
Position the crown back onto the tooth in the correct alignment.
Press gently into place.
Ensure it fits naturally and comfortably.
Step 9: Hold and Allow Setting
Bite gently on clean gauze to stabilize the crown while it sets.
Follow the recommended setting time in your kit instructions.
Step 10: Remove Excess Material
Carefully remove excess cement around the edges once slightly set.
Avoid disturbing the crown.
After temporarily fixing your loose crown at home:
Temporary cement is not designed for long-term durability.
Improper handling can worsen damage and complicate professional treatment.
A temporary repair can last a few days to a couple of weeks depending on:
However, it should always be considered a short-term emergency measure.
Even after a temporary repair, seek dental care if you experience:
Professional re-cementation ensures long-term stability and prevents infection.
Knowing how to temporarily fix a loose crown at home can prevent discomfort and protect your tooth while you wait for professional treatment. Using proper dental materials — not improvised solutions — significantly improves safety and short-term results.
Keeping a temporary dental repair kit at home provides peace of mind during unexpected dental emergencies and allows you to respond calmly and effectively.